RAFT-SUPPORT TRIP PREPARATION - GEAR & LISTS

So, you're preparing for Ace’s Raft-Supported 3-day Overnighter in the winter/spring on the Cumberland Plateau. The list below outlines what you’ll need.
NEED-BASED GEAR SYSTEMS
I like to look at gear in terms of needs. It's a more holistic way of considering the equipment we'll need for any given trip, and helps us in avoiding stuff we don't need. I break needs into the following categories:
Shelter/Sleep
Warm/Dry
Nourishment/Hydration
Health/Safety
SHELTER/SLEEP
There are a few options here. Below is a list of styles, with their strengths and weaknesses:
Tarptent ProTrail - 26 ounces - watch out, some of these require trekking poles! Or you can purchase a pole for many of them.
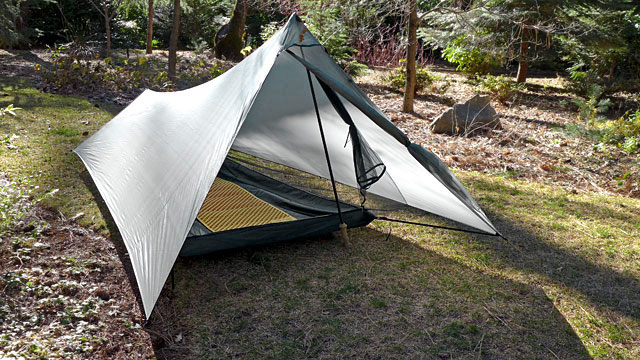
Tent - Tents offer the most protection. They add a fair amount of warmth, cut the wind well, and keep unwanted insects and other biological nasties out of your space. They also keep sand out of your sleeping area. The downsides are that they can be heavy, and require a fair amount of space to set up. I also can't understate the need for your tent to effectively ventilate condensation that develops inside the tent from your breathing. Pints of water can be breathed into the air from one night of sleeping, and you want to know that all that moisture is able to leave the tent. Ventilation ports at the top of the fly really help with this. Otherwise the temperature will be lower in the tent and you'll be damp if not wet in the morning. Waking up to condensation all over you, your bag, and your tent isn't pleasant. A one-person tent should be under 3 lbs, and a two-person under 4 lbs. One-person tents can be found as low as 24 ounces. Look at reviews and avoid tents that sound like they build up condensation. Most effective 3-season tents that are of the caliber we're looking for tend to be almost fully mesh screening other than the floor and lower walls, and have a silicon-impregnated nylon rain fly. This keeps the tent dry, breaks the wind, and allows the tent space to warm, all the while breathing that condensation out of the tent thanks to all the mesh. With the increase in tick activity and tick-born illnesses of late, if they're out, I'm using a tent. Tents require the most space for set-up, which can be problematic in rough terrain where developed sites aren't available. Some tents even can be set up without the screened in component, allowing you to just bring the poles and the fly for a bomber tarp configuration. While this is nice, the weight savings aren't always huge, since the screen-house portion weighs the least. Still, it may be an ideal application in certain conditions.

Bivy - A bivysack is essentially a waterproof (sometimes breathable) shell for your sleeping bag. Sometimes they have some type of design to where a pole or cord keeps the fabric off of your face. These can be light, but can often weigh as much as a one-person tent. Theres no storage space in these, and they can be a little tight. They usually pack smaller than a tent, which is a clear advantage, but make sure the weight/cost savings are worth the loss of functionality from a tent. This can be a great option, and pairs well with a minimalist, ultralight tarp. They also require the smallest space to set up, which is good if you aren't sure you'll have much room at your campsite. However, that means you won't have any extra room to keep other stuff in the "tent" with you, which may or may not be a problem. Since you have dry bags, it shouldn't be an issue keeping other things dry.
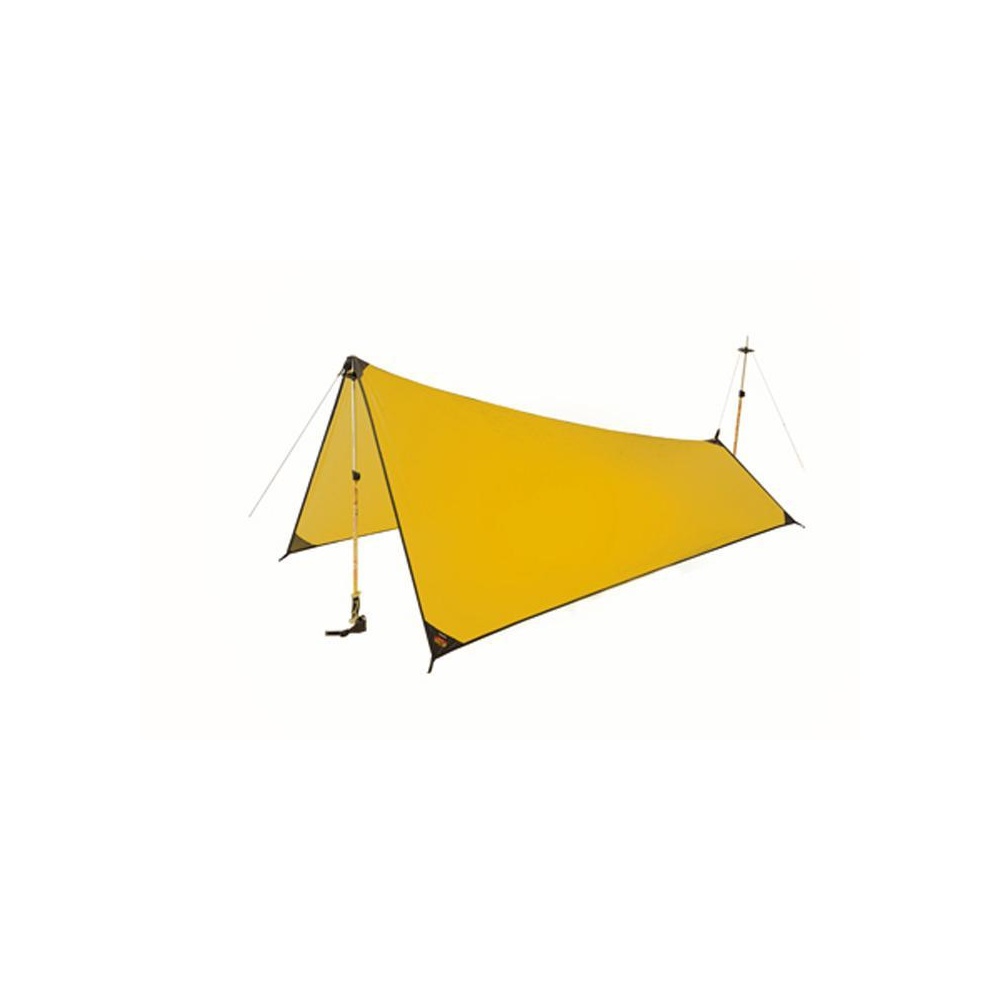
Tarp - Tarps can serve as an incredibly light, compact shelter, and are versatile as far as the different ways you can set them up and what they can be used for. On a paddling trip, a 4-piece breakdown works well as poles, or some sticks can work just as well. Tarps keep you out of the rain, cut some of the wind, and allow your sleep space to breathe and not build up condensation. They pack up very small in your drybag as well. The space required is less than a tent as well. Tarps can also be used as a cook-shelter or hang-out during a storm, or as a kitchen floor tarp for keeping your kitchen sand free and organized. The big drawback to tarps is that they take practice to set up. Don't bring a tarp without having practiced setting it up. Prevailing winds, humidity, and other factors will affect HOW you set them up. That said, I love my tarp, and at 7 ounces, as long as I'm not worried about bugs, it's a great option! For the tarp to weigh as little as this, you'll need to get a tarp made from silicon-impregnated nylon (sil-nylon). Cuben fiber is even lighter, but it's outrageously expensive. For a one person tarp, DO NOT go smaller than a 5 x 7 foot size. I have that size, and while adequate, you won't want to go smaller. 8 x 10 is a great two person size.
Hammocks - I'm not a hammock guy, though I admire the appeal. They can be effective in weight, compactness of storage, and set-up, but they do sleep a bit colder. Sleeping on the ground with a sleeping pad allows you to warm up the layer of air under your body. In a hammock, that's a lot harder to do. In short, I'm not very experienced with hammocks, and will refrain from commenting too far. My favorite appeal offered by the hammock is that you don't need a level, flat surface to set up, and that is quite a benefit. Just make sure you've done a cold night or two and felt comfortable before you bring one on a river overnighter!
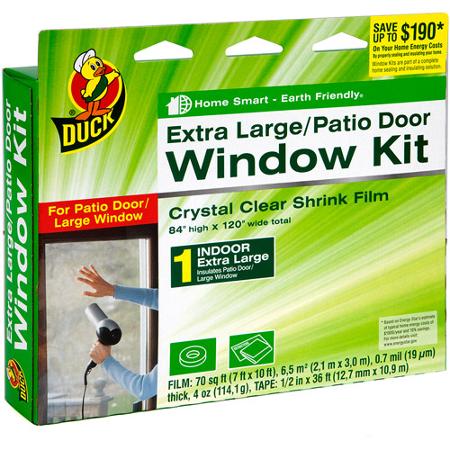
Groundsheet - If you use a tent or a tarp, you'll need a groundsheet. Groundsheets protect the tent floor from punctures, as well as your sleeping pad, and provide a barrier between you/your pad and the ground if you're sleeping under a tarp. Groundsheets are made for each tent, but annoyingly are usually sold separately, sometimes to the tune of $75 or more. A much cheaper and lighter alternative is to make your own out of Tyvek or Polychryo material. Tyvek is pretty easy to find at a local hardware store, but I'm a bigger fan of polychryo groundsheets. These can be bought from backpacking websites, but I prefer to get two for half the price you'd pay online by going to the hardware store. Go to the windows/doors section, and find a patio door/window insulation kit. It's a see-through, shrink wrap plastic film used for insulating windows and doors. It's usually around $7-10, and has enough material to make two of them. They don't last as long as real groundsheets, but almost weigh nothing, pack incredibly small, and can be cut to fit your needs. Make sure to get them big enough - the ones I bought were 84" x 110".

Sleeping Bag - This is one of the critical pieces of gear! Mummy bags keep you the warmest, as they reduce the amount of air between you and the inside of the bag that has to be warmed up. Considerations are weight, pack size, temperature rating and fill rating.
Temp Rating - For winter/spring trips on the Cumberland Plateau, I recommend a 10-30 degree bag. If you are consistently colder than your friends, don't go above 20. If you're in shorts regularly when your friends are bundled up, you might get away with a lighter bag. The ratings are subjective, so read reviews.
Weight - For the given temperature rating, no bag should weigh more than 3.5 lbs. I have a 30 degree bag that is 1.2 lbs, and a 15 degree bag that is 2.3 lbs.
Pack Size - The bag needs to be compact. If it fits down to the size of a 32 oz. Nalgene bottle, that's a small bag! For compactness AND weight, you MUST use down insulation! The only down-side to down is that if it gets soaked and clumps together, it's useless. Synthetic frankly doesn't do much better though, and the massive increase in weight and size synthetic introduces to the situation just isn't worth it. Keep your sleeping bag dry in your best drybag, and dry and secured at camp, and you're good!
Fill Rating - So Fill-rating is way the quality of the down is represented. The number represents how many cubic inches of volume that down from that bag will fill. The higher the number, the better. Many bags are 600 or less, but I highly recommend you go for at least 750 (I don't go below 800). This is what keeps you warm, so shop around and find a deal on at least 800 fill.
Here's what I have:
For warmer trips - North Face Beeline, 30 degree, 900 fill, 19 ounces, packs to the size of a large Nalgene
For colder trips - Marmot Helium, 15 degree, 800 fill, 37 ounces, packs a little bigger. I also add in a silk sleeping bag liner made by Cocoon, which supposedly adds 7-10 degrees in warmth, and if needed, will sleep in fleece layers. Sometimes I will wear my rain jacket and pants inside my bag, which create a vapor barrier that prevents moisture in my body from getting into the insulation of the bag.
For the very best in sleeping bags ($$$), check out Western Mountaineering, and Feathered Friends
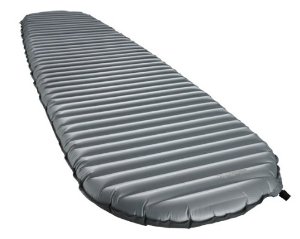
Neo Air Xtherm
Sleeping Pad - The sleeping pad is critical! It softens your bed, but most importantly keeps you warm. There are a few different types. Concerns again are weight, pack size, and warmth (R-factor). Never use open-celled foam pads, they're essentially sponges! Closed cell foam are the cheapest, and are fairly light, but they take up a lot of space. If you can cut them in half and make the halves re-attachable though (think velcro), you can store one half on each side of your stern wall, which can help keep heavier items from sliding to the stern of your boat and throwing your balance and trim off. For this reason I like closed cell foam pads like the therma-rest Z-rest. Closed cell foam pads keep you fairly warm with an R-factor of around 2.

Z Rest
Therma-rest's pro-lite and similar designs by Big Agnes used to be the rage, and still are for many folks. They are self-inflating pads that are reasonably light. If they pop, they still have some padding inside, but are heavier, bulkier, and not as warm as the new Neo-Air series by Cascade Designs.
Cascade Designs' Neo Air series has changed everything. They're pricey, but the best call in my opinion. Nothing packs up smaller, is lighter, and warmer than the Neo Air Classic and X-therm. The only risk is if you pop them they're done. They come with a patch kit though, and after over 100 nights sleeping on mine, it's still holding it's air. The Classic has an R-factor of 3.2, but the X-therm, which is my favorite, has an R-factor of 5.7! and it's still incredibly light and compact. If you have wide shoulders, are bigger, or simply like to have a little room, they make a big array of sizes with wider and thicker dimensions.
Pillow - You can use any spare clothing under your head, or even put some drybags under my sleeping pad to elevate the pad under my head, but I like the Sea to Summit line of pillows. There are other brands that do an ultralight inflatable pillow as well.
With the right shelter, groundsheet, pad, and bag, you can spend the night on any paddling trip and get a good night's sleep. Let's move on to the next need, Warm/Dry.
WARM/DRY
I need to be warm, dry and comfortable both on the water, and at camp. I also need to keep my equipment dry.
DRY BAGS
First off, to keep your equipment dry, you must have drybags. You'll need roughly 80 Liters of storage volume, give or take, for a 3-day winter trip. You can meet this need in a number of ways. Not everything needs to be kept dry, but your sleeping pad (if it's not closed cell foam), sleeping bag - most critical, shelter, stove, fire-starting materials and all clothing and toiletries should be kept dry. There are a few compaines out there that make decent bags, like Seal Line and Watershed. Seal Line's bags are not as quality, dry, or durable as Watershed, but the price difference is significant. There's something to be said though about buying it right the first time. Watershed makes the best dry bags on the market, period. The US Military contracts all their dry bag purchases with Watershed. If you think a raft-support trip may lead to full self-support trips in the future, consider the kayak-focused drybag solutions discussed below, otherwise any solid drybag will do. Feel free to doublecheck your drybag choice with me prior to the trip.

The Chattooga is a bit bigger, though this photo doesn't make it seem so.
1) Duffel style - these are just small duffel bags. You can put them long-ways on each side of your stern wall and clip to the seat, or if you have the room, one can actually be mounted with its long axis perpendicular to the boat's axis, and right behind the seat. This accomplishes the goal of keeping things right behind your seat, for ideal weight distribution. We want to have as little weight at the ends of the kayak and the most at the center, to lower the effort required to spin the boat. Duffels are more flexible in application than stow-floats. You can use them as a nice hiking/camera bag, by just using a shoulder strap. I like to use a Chattooga to put my bag, pad, shelter and layers in, and if one bag is less accessible it will be this one, since I just need it at camp. Then I'll use an Ocoee or another Chattooga to put lunch, camera, gloves, hat, toiletries, and any other things I might need during the day in, and I'll store it in a more accessible place. There's nothing worse than needing something in the drybag that is least accessible, or having lunch/side-hike items spread out between two different bags. Not only are we packing based on weight distribution for paddling performance, but also for convenience of access to gear when we need access to it. One note on the duffel-style - you've got to squeeze as much air as possible out in order to fit them into the stern, which can be a little bit of work. If you have to do this, they also aren't going to provide a large amount of floatation in the event of a swim (they still help). You can still stuff some small float bags in the stern behind the bags though.
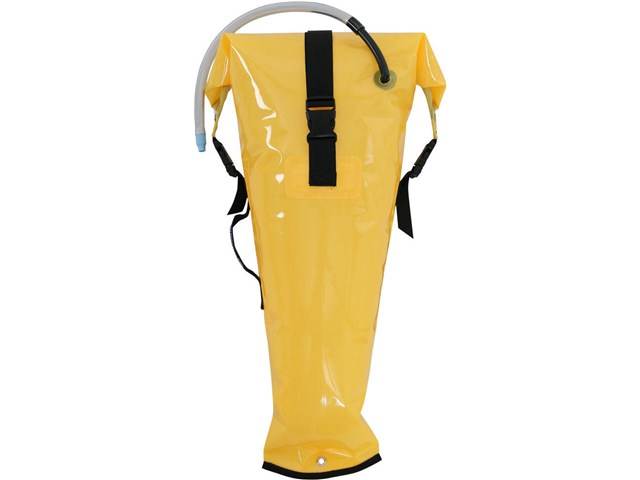
Futa
2) Stow-Float style - Watershed and a couple of other companies make this type of bag, which doubles as a float bag. Watershed makes the Futa, which is the standard stow float for the stern, and the Salmon, which is fatter and stores more, and can be put in the bow or stern. A nice feature here is that once your stuff is in the bag, there's an air valve just like in float bags, that you can open. Having the valve open allows you to squeeze air out of the bags to pop them between the seat and deck and then slide them into the stern. Once they're in, you can then re-inflate the bag to top off the floatation, which also helps lock the bags into the boat. These bags aren't as useful out of the boat, like for hiking with, as a duffel-bag, but they're great at what they do. Even if you have two Futa's, I recommend having an Ocoee to put lunch, hat gloves, and the like in, for quick retrieval. One other consideration is to pack the Futa's with the lightest stuff first, or deepest into the bag. That way, when in the boat, most of the heavy stuff is kept closest to the seat, reducing swing-weight.

Seal Line
Seal Line's bags are no doubt way cheaper in cost, and still work fairly well, for a while. I've just found they don't last as long as watershed, don't seal as definitively, and the bags are harder to keep clean. They also, if not perfectly rolled tight, can leak. The price is hard to resist though, and with care, you'll get your money's worth. Watershed's zip-lockesque seal ensure a dry seal every time. Aquaseal bonds very well with Watershed's material as well. I'm going on 10+ years on some of my watershed bags.
The downside to both Watershed and Seal Line is that they are heavy. However there has yet to be a light AND durable dry bag come to market. Until that day, it's worth the weight to have a Watershed. I will occasionally use REI or Sea to Summit's ultralight, inexpensive drybags for something non-crucial, but they're better for backpacking than the abrasive environs bags encounter on the river, and may only last 5-10 day trips on the river. Still, maybe that's a good place to put meals that are in freeze-dried packaging, pots, utensils, and other items that don't have to stay dry, and do it without breaking the bank. Just bring some Gorilla Tape in case you have to repair some tears/holes! And for packing your spork, or other sharp items, make sure they're padded/wrapped up so they don't damage your dry bags, or other sensitive items.
DRY SUITS - In the winter/spring, even in the southeast, the dry suit is one of the most important pieces of gear you'll own. It keeps you warm and dry in unexpected conditions, whether swimming or in your boat, and makes you MUCH more useful to your friends should a rescue be needed. It's part comfort, part safety, but when it comes to overnight paddling, it's even something more, helping make your paddling base-layers work double-duty as dry camp-wear for once you pull over for the evening.
Dry suits are nothing to skimp on with price, but you can get great deals on occasion.
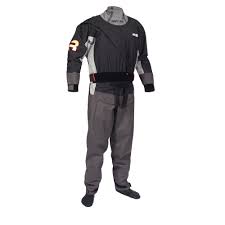
I'm personally a big fan of Immersion Research Dry Suits. They are more reasonably priced than Kokatat, and while they don't have "Gore-Tex" they have their own proprietary "breathable membrane" fabric, that I've found does a great job of breathing out moisture. Gore of course wants folks to think they are the only "real thing" but this simply isn't the case anymore. IR's Arch Rival is very dry and incredibly durable, and their 7 Figure is a little higher end, with fabric instead of latex booties, and rear-zip, as well as a smoother, less rugged fabric. The 7 Figure seems lighter as well. The new Devil's Club suit by IR puts a focus on durability, and looks like a great suit as well. You'll be tempted to get other brands of drysuits. Some have proven well, from manufacturers like Sweet, or Palm, but read reviews on not just quality but customer service. If you're going to spend at least $700 on a drysuit, skip the run-around and go straight for IR, or if you have money burning holes in your pocket, Gore-Tex from Kokatat. The customer service with either of these options is just as critical as the product itself. I've found IR's customer service tops them all by a long shot, as you're serviced by East Coast paddlers who are just as fired up about kayaking as you are, they are very reasonable on repair costs, and the gear is great!
Kokatat is a good option with a caveat. Get Gore-Tex! Kokatat is known for their great warranty but only when it applies to Gore-Tex. This is because W.L. Gore requires companies who use their material to offer lifetime warranties on the garment. If you get a suit from Kokatat not made with Gore-Tex, expect less help if the suit starts to have problems. In short, if you're going Kokatat, get the Gore-Tex Meridian suit.
Union Suits - IR makes wonderful union suits. They make two different ones - I have both, and they each have ideal purposes.
Their standard is a thick, warm fleece material that is VERY warm. If you're doing a float-trip in the snow, this is your suit! However, you can get hot very easily, so if you're going to be shredding every eddy, for hours on end, expect to get soaked with sweat. Breathable fabrics can get rid of some of the sweat, but don't have unrealistic expectations of how much moisture they can get rid of. Also, the more water you have on your suit more of the time, from continuous whitewater, lack of sun, and a worn drysuit, the less the breathable fabric can work. Many folks think their drysuits are leaking when they are actually just sweating a lot. In this case, taking breaks and rolling over to cool off actually keeps you drier.
IR has a new union suit called the K2, which is much thinner, and has fabric ridges that raise the suit off of your skin, which greatly expedites dry times, both while wearing in the drysuit, and at camp. Unless I'm going out in really cold weather, or am going to be sitting for a long time, I use this suit most. It's my winter work-out paddling suit, that keeps me warm, but breathes well and helps me not sweat so much, and dries faster when I do.
Dry Suit Double Duty! - Again, it's great to pull into camp with dry under-layers. This is a whole set of layers you don't need to bring in your drybag.
CAMP CLOTHING
Now let's look at what kind of clothes we need to bring to stay warm and dry at camp.
A warm hat is crucial. Remember space is limited, so bring something compact. Just because it's huge and fuzzy doesn't mean it's warm. A skull cap for paddling works, assuming you keep it in your dry bag during the day. A thin, windproof ski-mask is my favorite, due to how many ways you can wear it. You can keep it just around your neck for a neck buff, pull it over your nose and mouth, or just your mouth, or just wear it as a hat, or as a ski-mask. Find a light, compact, warm one, and you're set! If sun is an issue, bring a broad brimmed hat that's fleece-line for extra warmth, or if it's going to be hot, just an old straw hat.
Gloves/Mittens - I've found that gloves are never as warm as mittens, as your fingers are separated. However, it's hard to turn your stove down to simmer with mittens on. The compromise is liner gloves with warm mittens on top. Mittens off for work, Mittens on for relaxation. I think it's the best of both worlds, but personal preference goes a long way here. Just remember to bring something adequate, and put it in your day-accessible dry bag with your lunch and camera. They're nice to have at any time, along with a hat.
Socks - Wool socks are where it's at. The key here is that even when they're wet, your feet can be warm and comfortable. Look for smartwool/merino wool. Consider a lighter sock to wear paddling/hiking, and a heavier one for lounging around camp and to wear in your sleeping bag on those really cold nights. You don't really need a pair for each day, though having an extra pair is nice. For a 3-day trip, I usually bring 2 pairs of socks.
Footwear for Camp - In the summer, you can get away with Chacos, Crocs, Sandals, Flip-flops, etc. But in the winter you need a good shoe. For the raft support trip you have the space and luxury to just bring a good pair of hiking shoes for camp.
Base Layers - On any cold weather trip, never bring cotton - once the least bit wet, you're going to shiver from there on out. Bring synthetic mid-expedition weight layers made for hiking/backpacking. They keep you warm even if they're a little wet. A long sleeve top and bottom layer will do. Remember again, that if you're using a good drysuit and don't sweat much, you can use your union suit or whatever layers you had on at camp as well.
Rain/Wind Breakers - to keep that warmth in while at camp, you need a light rain jacket and rain pants. Waterproof/breathable is best. These layers keep your warmth in, break the wind, and keep you dry. Never get a jacket that doesn't have a hood! The extra weight is nothing, and it doubles as a hat, or an extra hat. Frogg Toggs Driducks are also popular and affordable. A cheap, non-durable option is a tyvek suit available in the paint section at your local hardware store. I used one of these on a portage in Black Canyon in Colorado where there was so much poison ivy it was the only way to keep it off of us. It works well in the rain for a few rainy nights, but will eventually wet through.
Coat/Jacket/Hoodie - That extra top layer sure is nice much of the time, and is something you might consider keeping in your lunch bag if you have the room. The very best route to go here, if you can afford it, is an ultralight down hoodie/jacket. Ultralight, super-compact to store, and incredibly warm. Make sure the baffles aren't too big, otherwise the down insulation will settle to the bottom of each baffle, and won't be able to evenly insulate your body. A hood is a no-brainer as well, making the jacket much warmer. These are expensive, but are perfect for the job. Some companies even make down pants and booties. Typically this isn't worthwhile until you get down below freezing. If opulence is your thing though, they're out there!
NOURISHMENT/HYDRATION
We’re bringing and cooking the food, and will have plenty of water for you as well. Please bring your own cup for hot beverages, fork, spoon and knife for eating, and a full water bottle to start with, and we have the rest covered!
HEALTH/SAFETY
HUMAN WASTE - If it’s liquid, the world is your oyster. For the other business, we’re bringing wag bags for everyone as well as a groover to store them in once you’re done, We’ll have hand sanitizer at the station as well, but I recommend bringing a small bottle of sanitizer for your personal use as well.
FRESHENING UP! - No shower, no problem! They actually make big wet wipes that are for your body. Just bring a couple (don't bring the whole package, just bring what you need in a small ziplock). I usually don't need one for a three-day trip unless it's really hot. If it's super cold and dry, I'll bring a tiny little hotel bottle of lotion to keep my nose and hands from cracking, and a stick of lip balm. A kid size toothbrush and a small paste tube, along with a mini-floss round out my hygiene kit. And don't forget the sanitizer! If it's super sunny, a little bit of sunscreen and sunglasses too. Just remember, all these little things add up. Don't be afraid to portion and re-package to cut superfluous weight.

REI Flex Lite
EXTRAS
If you've done a great job at minimizing your set-up to only what you need, and the most compact and lightweight, you can indeed splurge on an item or two. Don't get carried away, but if you have room you can bring the following:
Camp Chair - I personally bring a chair any time I have room and can handle the weight. REI makes a great chair called the Flex-Lite. At under 2 lbs and very comfortable, this chair is hard to beat. Big Agnes and a few other companies make ritzier, larger versions, but the Flex-Lite is perfect when space is at a premium.
Book - bring a small book to read before going to be, or some literature/maps specific to the area to supplement the experience.
iPod/headphones - sometimes music goes well with the experience. Putting your device speaker first into a pot or bowl makes a nice speaker, just be sensitive to the musical tastes of others. Many folks think it sacrilege to play the stereo in the woods. Chances are, there'll be several of those folks on your trip.
Alcohol - different areas obviously have different regulations. Check them before bringing the booze. Usually there's always some space for a bladder of wine or liquor, or a few high gravity tall boys.
Camera - I always am cautious to not get hijacked by my tendency to take lots of pictures, but it's the best way to remember the places we go. Double-duty for the phone that shoots pics and also plays music, and even serves as an emergency contact device in certain areas.
Notebook/Pen - Some of the most insightful moments of your life might be on trips like this. Jot your thoughts down so they permeate into your daily life, well after returning to the grind.
There's lots more to list, but you get the drift
Earplugs - if you're sharing shelter, or even just have a hard time falling asleep, these take up little space and can make a big difference.
GEAR LIST
Here's a list to get you started:
Shelter - Ultralight tent and accessories, tarp, hammock or whatever your preference
Sleeping Pad - light, compact, comfortable
Sleeping Bag - Marmot Helium 15 degree is what I’ve been bringing
Sleeping Bag Liner - if really cold
Camp Chair - compact lightweight
Dry Bags - 1 Watershed Colorado, 1 Ocoee
Layers - IR thick Union Suit, IR K2 union suit, synthetic long sleeve top and bottoms
Underwear and a pair of hiking shorts
Socks - Two Pairs of Smartwool socks, one medium thickness, one expedition thickness
Hiking shoes
Hoodie - Eddie Bauer Down Hoodie
Down Pants - bougie! I have Mont Bell 800 fill pants that are anything but stylish but keep me very warm.
Ski-Mask
Mittens
Liner Gloves
Ultralight, packable Rain Shell and Rain Pants
Headlamp - Black Diamond Storm, extra batteries if not sure how much is left
Cup for hot or cold beverages
Fork, Spoon, Knife
Any personal beverages within reason
32 ounce Nalgene
Wet Wipes - rationed amount
Pack Towel - small
Hand Sanitizer - small bottle
Lotion - tiny bottle
Lip Balm
Toothbrush - travel, breakdown
toothpaste - tiny tube
Dental Floss - tiny box
Sunscreen - tiny bottle
Sunglasses
Bug Spray - probably not necessary for our trips
Cell Phone for camera, music, and emergency contact
River Knife
Throw Rope
Whistle
Carabiners - Two Locking
Drysuit
Adequate Footwear
Skirt
Helmet
PFD
Paddle
Pogies
Breakdown Paddle if needed
Boat
Whatever you bring, it all needs to fit well in your drybag(s). Some of you may just have one big drybag, while others may use a few small ones.
If you have questions, email me and I’ll help get you squared away!

photo by Jim Janney